Showing posts with label eye makeup. Show all posts
Showing posts with label eye makeup. Show all posts
Tuesday, January 29, 2013
Valentines makeup look ideas
Hi Ladies and welcome to this week’s special Valentine’s Edition of Ask Grace FaceQuizite. As Valentine’s day is just a couple of days away, I have come up with two different looks that will work for a special valentine’s day date with your special one. I understand that some of us struggle when it comes to how we wear our makeup when trying to impress someone we like very much, especially those in a new relationship. For some reason, we tend to get confused about the tiniest of things. Things that normally wouldn’t stress us out eg what do i wear, how should i wear my makeup, what do i do with my hair etc. Suddenly start to cause us unnecessary stress. So, to help alleviate at least one of these causes of stress, I am suggesting the two makeup looks below and giving you a step by step guide on how to recreate them.
Both looks are very suitable for Valentine’s day and very easy to re-create. I love them both though I never wear red lipstick but thought “why not? It’s valentine’s.
I am currently working on creating video tutorials for different looks so do watch out for these. I will also endeavour to include step by step pictures of each look in my future articles so please bear with me till then.
Once you have decided on which look to go for, follow the step by step guide below to recreate it .
Look 1 – Silver Ring
- Apply eyeshadow primer all over your eye lid
- Apply an eyeshadow base from lashline to crease preferably in black or charchoal
- Apply a gray eyeshadow colour on your lid, from lashline to crease
- Apply black eyeshadow to the outer corner of your eye and blend
- Apply a colour close to your skin tone to the crease area in sweeping motions to blend out colour eg a light brown.
- Apply a silver eyeshadow or glitter to the inner corner of the eye to give it extra pop.
- Apply a light eyeshadow colour eg MAC’s Arena or Shroom to your browbone.
- Apply Eyeliner on your upper lid and your waterline
- Apply Mascara on both top and bottom lashes and finish off the look with false lashes for that extra Vava voom.
For this look i will recommend a light colour on your lips but you can wear it with a darker colour if you so desire.
Look 2 – Smoulder
- Apply eyeshadow primer all over your eye lid
- Apply a nude colour eyeshadow base all over the lid from lashline to browbone.
- Apply a light eyeshadow colour eg MAC pigment in Naked all over your lid from lashline to crease
- Apply a brown eyeshadow colour to your crease area in sweeping motions ensuring you don’t take the colour too high
- Blend, blend, blend.
- Apply a neutral colour to your browbone eg MAC eyeshadow pigment in Vanilla or eyeshadow colour in Arena.
- Apply eyeliner on your upper lid and your waterline
- Apply Mascara on both your top and bottom lashes and finish off the look with false lashes.
For this look I would recommend stronger lips eg red or plum but preferably red, to go with the Valentine season. I never wear red but I did just to show you how well it works with this look.
So there you have it. Two lovely looks to choose from for your valentine’s day date with your special one, or even a night out with your girls. Ensure you practice your preferred look prior to the special day, and whatever you do, make sure you look and feel fabulous.
Source
Source
Valentine's Day Makeup Ideas 2013
Looking for a hot new makeup look for Valentine's Day 2013? Check out these fabulous makeup looks and put your skills to the test to create the most seductive makeup you've ever worn!
If you're looking to make Valentine's Day 2013 memorable, you have to pay more attention to details and treat yourself with a good old fashioned makeup session! Now, you don't have to be a pro to create some sizzling Valentine's Day makeup looks and to help you look mesmerizing we've put together an inspirational selection of Valentine's Day makeup ideas to recreate. Choose the one that you feel reflects a bit of your personality and run off to the nearest department store to stock up on any makeup products that you don't already have in your beauty kit.
The basic makeup products you'll need to create a fabulous makeup look are: sheer lip gloss, bright colored lipstick, foundation, blush, eyeliner and mascara! So, you beauty lovin' babes can use the above stated products to create one of the following looks:
The basic makeup products you'll need to create a fabulous makeup look are: sheer lip gloss, bright colored lipstick, foundation, blush, eyeliner and mascara! So, you beauty lovin' babes can use the above stated products to create one of the following looks:
The Seductress
 The honeys that want to go for a sexy yet classic makeup look can easily do so by opting for subtly defined eyes and bold colored lips. Get your skin looking flawless by putting foundation on and continue with eye definition with a flicked line across the lashes with a quality gel line. Add lashings of mascara and a soft peachy blush applied strategically on the cheekbones, then finish the look with the perfect red lipstick. Channel your inner seductress with this classic winged eyeliner/red lip makeup look and make your beau fall in love all over again from first glimpse!
The Romantic
A girly pink-based makeup never fails if you're looking for a look that packs naturalness, innocence and a romantic flare. Thankfully, there are plenty of pink based makeup products to choose from to meet the needs of your skin tone. After applying a lightweight foundation, blend two shades of pink eyeshadow across your eyelids. Use the light pink shade around the inner corner of the lid with the deeper pink into the crease and outer corner of the eyes to give the eyes depth and definition. Coat your upper and lower lashes with mascara and focus on creating the perfect pout using a berry pink tone lip color. Finish the look with a hint of pink blush on your cheeks which will help emphasize your features all while underlining your all-romantic mood!
The Mysterious
If you're not afraid to play with intense eyeshadow pigments, opt for a sultry, mysterious smokey eye makeup that creates an unforgettable piercing gaze. If you picture the perfect Valentine's Day as a candlelight dinner with just you and your man, this makeup look is perfect for you! Add depth and drama to your gaze with metallic earth tones, emerald, purple, you name it as any deep shade mix will give your peepers an intense, irresistible allure. Kohl eyeliner smudged across the upper eyelashes, intensely mascara coated lashes and beautifully sculpted cheekbones are the details that will make all the difference when it comes to this type of makeup. A sheer lip gloss is all that you need now to look amazing and to keep the look balanced and seductive, so gather your favorite pigments and start experimenting to get the perfect Valentine's date makeup!
Get a romantic makeup look for Valentine's Day
If you're going out for a romantic Valentine's Day date this Feb. 14, we suggest matching your makeup look to the loved-up mood of the day. No matter where you're heading, we have some expert tips for getting a fabulous, romantic look you and your Valentine are sure to love.
Romantic beauty must-dos
We turned to celebrity makeup artist and beauty expert Jemma Kidd for her makeup tips on creating the ultimate romantic look for Valentine's Day.
Romantic palettes by skin type
First things first! To create a romantic look, you need the right shades. Kidd provides some insight into what hues to look for based on your skin type.
 Porcelain
If you have porcelain skin, look for a lipstick shade that is brownish pink or soft apricot, cheeks should be in a pale peach, apricot or very soft natural-blush pink and for eyes, stick to cool neutrals or soft pastels. Shades of gray can also work for an evening makeup look.
 Fair
Fair
If you have fair skin, look for lipstick colors in warm neutrals like nudes and pinks, a pink shade for the cheeks (anything from brownish pink to fuchsia) and for eye makeup, you can wear almost any shade in the warm and cool tone range. Just avoid anything yellow or orange and keep the shades muted.
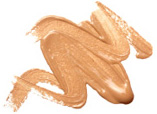 Medium to olive
Light olive skin should look for coral and peachy pinks or berry, plum and browns for lipsticks, coral pink and soft orange tones for blush and neutrals within the earthy brown and mossy green shades for eye makeup.
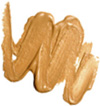 Olive
Olive
Dark olive skin tones look great with a dark, warm color to warm the lips, apricot and peachy pinks on the cheeks and warm gold, peach, olive or plum tones on the eyes.
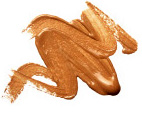 Darker tones
Deep skin looks great with almost any deep shade (think berry, rose, coral, coffee) on the lip, plums and apricots on the cheeks and bronze, burnt orange, olive, sapphire and plum colors are flattering for eye makeup.
Getting started
The first thing Kidd stresses is that even though you want to look great, it's important not to go overboard. "The number one thing to avoid is thinking that you need to look like a completely different person. Your husband, boyfriend or partner wants to see the 'you' they love, so make sure you look like yourself, but your most gorgeous self," she says. "Generally, men aren't fans of too much makeup, so don't freak them out by using too much color. Save extreme makeup looks for another occasion and aim for natural, feminine beauty."
Use cream formulas rather than powders, but nothing too heavy. "If you pile on the foundation, you can end up accentuating rather than masking even the smallest imperfections," the makeup artist explains.
Getting the look
Taking good care of your skin is the first step towards successfully creating any desired makeup look. "The key to romantic makeup is flawless dewy skin, so be sure to keep the skin hydrated," says Kidd. She provides some simple steps for getting gorgeous for Valentine's Day.
1.Hydrate & correct
First, prepare the skin by moisturizing. Follow with a citrus-based color corrector to counteract undereye blue/purple undertones and neutralize any unwanted red tones, such as spots and blemishes. Use in conjunction with the apricot shade to further brighten and even the skin tone.
2.Apply foundation
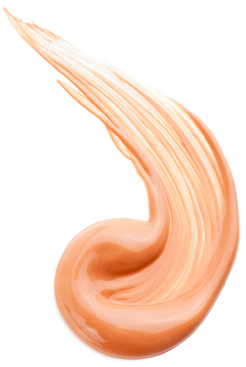
Next, apply a light-reflecting sheer liquid foundation and use a concealer only where you need it most. If you have a particularly oily t-zone, dust with translucent powder to set.
3.Add cheek color
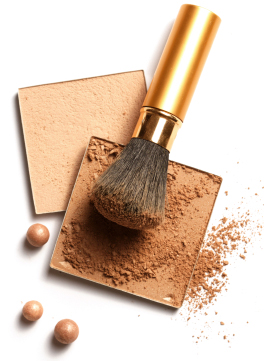
Apply a blend of sandy beige and pink powder blush to the apples of your cheeks and blend along the cheekbone. To add some extra warmth to skin, finish with a light dusting of bronzer along the edges of your face and gently across the bridge of the nose, where the sunlight would naturally fall.
4.Add eye makeup
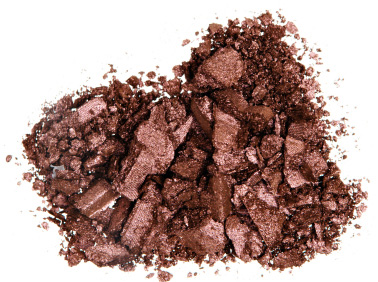 rush on neutral beige eyeshadow and blend shimmery mocha eyeshadow on top, working it from the lash line to the socket crease. For a more sultry look, blend plum eyeshadow into the hollow of the socket focusing on the outer corners. Using a fine eyeliner brush, apply a thin line of shimmery mocha shadow just under the roots of the lower lashes and blend to touch in the inner corners to open up your eyes.
5.Enhance eyes
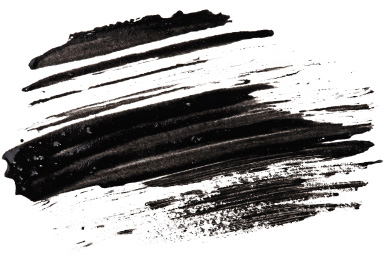 For added definition, draw along the upper lash line with a black eyeliner pencil and thicken the line gradually from the middle of the eyelid towards the outer corner of the eye, extending it slightly beyond the eye and curving it upwards to create a subtle flick. Draw along the inner rim of the lower lid to elongate the eye. Curl lashes and apply mascara.
6.Paint your pout
Apply silky lip gloss in shell pink for a touch of color and a glossy finish. Try JK Jemma Kidd Lip ID Color-Adapt Lip Gloss ($20 at Target) which changes color depending on pH balance to give a natural finish.
MAKEUP TIPS FOR SUMMER…!!!
summer makeup tips show you how to take your look, go sheer and look sensational all day long. When you need professional makeup artist advice these hot weather secrets will to help you achieve a look that can last all day. Discover how to enhance your tan, turn your foundationand get the best look for your eyes and lips. Adding sizzle to your look is easy!
Here we are going to discuss them along with some other tips to keep you pretty like sunshine:
Essential protection
Protect your skin from damage this summer by using a moisturiser with an SPF factor of 15 or higher. Use it daily and you’ll help to combat those early signs of aging such as sun spots and fine lines. Remember that you’ll be exposed to harmful UVA and UVB rays even on a cloudy day. Apply your SPF moisturiser to a clean face and allow 10 minutes for it to absorb before applying your foundation.
Lighten up
When the warm weather hits you might find that foundation and powder feels too heavy on your skin. For a fresher, lighter look switch to a tinted moisturiser, apply with a damp sponge and you’ll be sure to get an even look. A little concealer dabbed under the eye will give added radiance.
Fake it
On a lovely summer’s day there is nothing better than the appearance of a healthy glow to make you feel better, and one of the easiest ways of achieving this is with bronzing powder. If you’re worried that you’ll choose the wrong shade of bronzer and end up looking orange instead of sun-kissed, Colour Me Beautiful has a range of shades that have been specifically created to suit your skin tone.
The Eyes Have it
Eye shadows in lighter, neutral shades are perfect for the summer. If it’s really hot and you don’t want to go to the effort of applying a full make-up, a touch of mascara and a little eye liner will ‘open’ up the eye and bring your face to life. For a lighter, more summery appearance, swap your black mascara for one that is either brown-black or brown. To complete your look remember to have your eyebrows professionally shaped.
Essential Waterproofing
There is nothing worse than running mascara, so if you’re planning a beach holiday or going to a wedding, consider your choice of mascara with care. Waterproof mascara is great, but you’ll probably need an oil-based eye make-up remover to take it off properly so that you don’t get an unsightly build-up. If you don’t want the hassle, it’s worth getting your eyelashes professionally tinted. If you’re particularly fair and have very light eyebrows it’s worth getting them dyed too.
Luscious Lips
Being out in the fresh air can take its toll on your skin and that includes your lips. If you’re sunbathing, it’s important to remember to use some lip balm to keep them soft and supple. When you’ve got a slight tan, a touch of lipstick or lip gloss is often all you need to face the world.
Holiday Glam
Make the most of your newly-acquired tan by using Colour Me Beautiful’s fabulous new Glow highlighter on your cheekbones and brow. With its subtle pearlescent lustre it looks amazing on tanned skin and you can even use it in the daytime to help keep your holiday glow when you return to work. For a touch of instant evening glamour apply the Glow highlighter to your shoulders and decolletage.
Cheeky Cheeks
If you don’t like using fake tans and bronzing powders, the easiest way to achieve a healthy natural glow is with blush. Whether your blush is an ultra-fine powder or a light cream, the rules are the same.
Apply it along your cheekbones or the apples of your cheeks, depending on your face shape. Remember to build up the colour gradually until you get the soft natural glow that you’re looking for.
Tip-top Toes
You’ll want your feet to look their best if you’re wearing sandals or flip-flops this summer. Build time into your weekly beauty routine to pamper them. Remember to use a pumice or foot file to keep them free from dry skin and unsightly cracked heels and moisturise regularly to ensure that skin appears smooth and supple.
And Finally
If you are going to be spending large amounts of time in the sun, whether in the garden or on the beach, make sure you invest in a bottle of sun tan lotion, a floppy sun hat and a pair of sun glasses to help protect your skin from potential sun damage.
Monday, January 28, 2013
6 secrets I learned at makeup artist school
You could say that I have a love/hate relationship with makeup. Some days I enjoy playing with all the different colors and get excited when my smoky eye turns out perfectly.
But then there are those days when my liner refuses to go on straight, my bronzer makes me look like an Asian Snookie, or my lashes refuse to curl. That's when I want to toss my makeup bag out my bathroom window.
I had one of those days last week, and after walking into work wearing two very different winged tips on my eyes, my editor assigned me a new story: Go to makeup school and write about it.
Want to see the best techniques I picked up without spending the thousands of dollars (and crazy amount of time) it takes to go to makeup school yourself?

Totalbeauty.com
Lesson No. 1: Spend some bucks on your tools
At Napoleon Perdis' Makeup Academy in Hollywood, Rebecca Prior, NP's National Educator, begins the first lesson by introducing us to our tools. "To me, tools and products are equally as important as the makeup skills that you have," she says. For example, let's say you were using mediocre brushes, mediocre products, and had average skill. Just by improving the quality of your brushes and using richer pigmented products, the application would immediately be better, even without improving your technique. So if you really want to apply your makeup like a pro, Los Angeles-based educator Felicia Alva says, "Do what the professionals do: Use the proper brushes for application."
At Napoleon Perdis' Makeup Academy in Hollywood, Rebecca Prior, NP's National Educator, begins the first lesson by introducing us to our tools. "To me, tools and products are equally as important as the makeup skills that you have," she says. For example, let's say you were using mediocre brushes, mediocre products, and had average skill. Just by improving the quality of your brushes and using richer pigmented products, the application would immediately be better, even without improving your technique. So if you really want to apply your makeup like a pro, Los Angeles-based educator Felicia Alva says, "Do what the professionals do: Use the proper brushes for application."
Here are the eight basic brushes you need:
1. Foundation brush
2. Concealer brush
3. Fluffy powder brush
4. Blush brush
5. Small blending brush
6. Flat eyeshadow brush
7. Precision angle brush
8. Lip brush
2. Concealer brush
3. Fluffy powder brush
4. Blush brush
5. Small blending brush
6. Flat eyeshadow brush
7. Precision angle brush
8. Lip brush
Once you have your tools, you need to know how to hold them. Make Up For Ever educator Lijha Stewart says, "Where you hold a brush on the handle affects your control. The closer your fingers are to the barrel (the silver section beneath the brush head), the more pressure you put on the brush head and vice versa." In general, if you want to apply color evenly, place your fingers on the center of the brush handle. Another tip: You can easily turn a fluffy brush into a flat, angled brush by wrapping your hand around the bristles and flattening them.
More from TotalBeauty.com: 12 Best Makeup Primers
11 Makeup Mistakes You Don't Realize You're Making
How to Apply Eyeliner: 10 Looks for Beginners and Pros
11 Makeup Mistakes You Don't Realize You're Making
How to Apply Eyeliner: 10 Looks for Beginners and Pros

Lesson No. 2: Mix primer with your foundation
I'm sitting in Make-up Designory's Beauty 101 classroom and I'm anticipating today's lesson to be quite the bore-fest. I'm barely paying attention as lead instructor Gil Romero goes through the three different types of foundation: liquid, powder, and cream. Yawn. Wake me up when I'm going to learn something new.
I'm sitting in Make-up Designory's Beauty 101 classroom and I'm anticipating today's lesson to be quite the bore-fest. I'm barely paying attention as lead instructor Gil Romero goes through the three different types of foundation: liquid, powder, and cream. Yawn. Wake me up when I'm going to learn something new.
It seems like Romero read my mind, because he immediately hit me with this tip: "You can wear cream foundation as is for opaque, full coverage, or you can break it down to be more translucent by mixing it with some primer," he says. What? Isn't primer only supposed to go on before foundation? But Romero says this is a surefire way to retain the foundation's coverage without looking caked on. Plus, you get to reap the long-lasting durability that cream foundation has over liquids and powders. Prior says this also helps the makeup blend seamlessly with the first layer of primer on your skin.
I raise my hand at this point and ask if cream foundation is OK for oily skin. This is a selfish question, because I struggle with a mid-day oily T-zone. Make-up Designory educator Yvonne Hawker (who also wrote the school's textbook) says everyone can use cream foundation, but those with oily skin should use a damp sponge to apply it. Most foundations have oil in its formula to give the coverage blend-ability. Using the sponge will "pick up the pigment, but not the oil in the foundation." You'll still get great coverage, but not the shine.
For dry or combination skin types, "use your foundation brush and buff the foundation onto the skin, concentrating on the center of your face, which is typically where your skin has the most discoloration," says Hawker. "The further you get from the center, the less coverage you want."

Lesson No. 3: Love your flaws — then conceal them
It's day 3 at makeup school and there's a color wheel on the whiteboard. "The key to being a successful makeup artist is being able to identify someone's undertones and know how to manipulate the color wheel to get rid of unwanted color," says instructor Gina Sandler.
And when Sandler says "unwanted color," I immediately tune in because I want to learn how to cover up my zits, the stubborn redness around my nose, and the bluish hues under my eyes. She says opposite colors cancel each other out, so green-pigmented concealer covers redness, and orangey concealer removes blue. "If you use your beige concealer, it'll only make those areas look muddy," says Prior.
Once Sandler shows us how she gets rid of zits, redness around the nose, and under-eye bags on one of the students, she then pairs us off and has us practice on each other's makeup-free faces. Immediately, all of my insecurities start bubbling up. My bags, my zits, my dark spots … is someone seriously going to be inches away from them? Then one of the students says, "Ugh, I'm so ugly." Sandler responds, "No, you're so cute! You all are!" It's makeup school, but it starts to feel more like we're in a group therapy session. Sandler says practicing on each other is key because you quickly learn how to deal with all types of skin tones and facial features, which you will have to become comfortable with if you want to be a professional.

Totalbeauty.com
Lesson No. 4: Fix your face shape
So here's a not-so-secret confession: I hate my face. It's rounder than a Cabbage Patch Kid's and I can't stand my button nose. So when Prior says today's lesson is learning how to contour properly so you can alter your face shape and features, I'm so eager to learn I actually volunteer to be her model at the front of the class. "Contouring is the art of highlighting and shading," says Prior. "Anything that is lighter than the skin tone will make an area more prominent, anything darker will make that area recede." Here's how you can easily alter your face:
So here's a not-so-secret confession: I hate my face. It's rounder than a Cabbage Patch Kid's and I can't stand my button nose. So when Prior says today's lesson is learning how to contour properly so you can alter your face shape and features, I'm so eager to learn I actually volunteer to be her model at the front of the class. "Contouring is the art of highlighting and shading," says Prior. "Anything that is lighter than the skin tone will make an area more prominent, anything darker will make that area recede." Here's how you can easily alter your face:
If you have a round face and want to make it look more oval: Apply a bronzer a shade or two darker than your skin tone in a "3" shape alongside your face: on your temples, the hollow of your cheeks, and your chin. If you have a prominent forehead: Shade around the outer edge of your forehead along your hairline to minimize the area with bronzer. If you have a flat or wide nose: Shade alongside your bridge starting from your inner brows. Then highlight right on the center of your nose.
If gravity is taking a toll and your cheeks are sagging: Apply a highlighter just above your cheekbone all the way to your temple. Use a blush directly on the cheekbone, then use a bronzer in the hollow of the cheek, underneath your bone.
And if you really want to make your contouring stand out, use a sparkly highlighter, which will reflect the most light. Then for your bronzer, go for a matte finish, which will absorb light and create a stark contrast.
More from TotalBeauty.com: 12 Best Makeup Primers
11 Makeup Mistakes You Don't Realize You're Making
How to Apply Eyeliner: 10 Looks for Beginners and Pros
11 Makeup Mistakes You Don't Realize You're Making
How to Apply Eyeliner: 10 Looks for Beginners and Pros

Totalbeauty.com
Lesson No. 5: Make your eyes pop by changing their shape
Just like how I learned to use highlights and shadows to contour my face, I found out that I can use the same info to alter my eye shape, too. Whether you have drooping lids, narrow-set eyes, or they're simply too small, you can use your knowledge of light and shadow to change them.
Just like how I learned to use highlights and shadows to contour my face, I found out that I can use the same info to alter my eye shape, too. Whether you have drooping lids, narrow-set eyes, or they're simply too small, you can use your knowledge of light and shadow to change them.
If you want to add definition: Sweep a light bronzer through the crease of the eye, which is halfway between the lashline and the eyebrow. "As you age, the eye area loses elasticity, and things aren't as shapely as they used to be," says Prior. "This technique is great for mature skin, to give the face more definition." A tip for you blue-eyed girls: An orange-y bronzer in your crease will make your eyes even bluer.
If you have narrow-set eyes: To elongate your eye width, apply a black liner to the outer half of both your upper and lower lashlines, connecting at the outer corner.
If you have drooping, heavy lids: Use what you just learned about highlights and shadows to lift your eye. Apply highlighter above your crease, from the inner to outer lid. Then blend a shadow to the area that you want to push back, which would be the heavy fold. Make sure to blend the edges from the shadow to the highlight.
If you have small eyes: Apply a beige-colored eyeliner to your lower inner rim, which will help make eyes look more open. Then use a black pencil liner along your entire upper and lower lashlines, connecting the lines at the outer corner. The key is to blend the liner with shadow, going outwards. Wherever you place the darkness is where your eye will go, so by smudging the lines, it gives the allusion that your eyes are taking up more real estate on your face.
And the tip I love most for natural definition: Apply a black pencil to your upper inner rim. "It lengthens the eye and it also sharpens the appearance of the eye, giving more fullness to the natural lashline without seeing the hard edge of a liner," says Prior.

Totalbeauty.com
Lesson No. 6: Think opposites when it comes to color
Remember how I learned that opposite colors on top of each other cancel each other out? OK, well today I learned if you place them side by side, they help each other stand out. Simple, but super important when you're trying to pick the most flattering eyeshadow colors. Here's a cheat sheet:
Remember how I learned that opposite colors on top of each other cancel each other out? OK, well today I learned if you place them side by side, they help each other stand out. Simple, but super important when you're trying to pick the most flattering eyeshadow colors. Here's a cheat sheet:
For blue eyes: Since orange is the opposite color of blue, anything with orange in it will make blue eyes stand out more. "It doesn't have to be a blazing sun color — it just has to have orangey undertones like gold, apricot, or peach," says Prior.
For green eyes: Red is the opposite color of green, which isn't to say you should apply a cherry red-colored eyeshadow to your lids. But you'll help your green eyes pop if you use colors that have red undertones, like deep plums and wine.
How to Apply Eye Makeup in 8 Steps
When evening calls for a glamorous look, you want to focus on making your eyes amazing. Here's how to apply eye makeup in only 8 steps.
- Prep your eyes with concealer Concealer can be used to cover up under-eye circles or just the bluish discoloration just under your inner eye. To cover dark undereye circles, apply three dots of concealer under each eye. Start at the inner corner where skin tends to be darkest, then under the pupil and the third on the outer edge. Pat, never rub with your ring finger (this finger tends to have the softest pad) until it disappears.
- Apply eye base to your lid Eye base is the secret to keeping your shadow in place for hours. Without properly priming your lid first, your eyeshadow will likely end up a greasy line in your crease.
- Follow with eyeliner Dark eyeshadows work great as eyeliners. Wet a slanted brush, then dip in a dark eyeshadow. Line eyes as close to the upper lashes as possible from the inner corner to the outer corner. Follow with liner on bottom eyes, but only line from the middle of the eye out. Smudge the bottom line with a Q-tip or your finger. You don't want a prominent line. For a smokey eye, use a brush to pat in a dark eyeshadow along the upper lid and below the lid. You don't want a stark line, instead you want to blend it so it's "smudge-y."
- Apply eyeshadow. It's great to use a three-toned shadow and build from lids to brow (see How to apply eyeshadow). Allowing them to blend into each other like a rainbow is gorgeous, according to celebrity makeup artist Mally Roncal. Start with a light color that almost matches your lid. Sweep the color across the lid and up to your browbone. Follow with a medium color across your lid only. Build on this with a darker color in the crease. Blend the colors well.
- Brighten your eyes with a highlighter This step involves only the inside part of the eye. Putting a bit of your lightest eyeshadow in the inner corner of your eye will brighten it significantly (this is the makeup artist's secret and I use this trick all the time). I usually dab a finger into my lightest eyeshadow and then I press it into the inner corner of my eye where the upper lid meets the bottom lid. This totally makes eyes "pop."
- Highlight your brow Take the same light eyeshadow and dab it on your browbone, concentrating on your mid-brow outward. Blend with your finger. I like to use Yves Saint Laurent's Touche Eclat just below my brow and just above it, but a super light shadow will do you.
- Curl lashes An eyelash curler will make even long lashes look more gorgeous. For added effect, you can heat the curler under a blowdryer for a couple seconds. Test curler before applying to lashes because you could burn yourself.
- Apply mascara Place the wand of your mascara brush at the bottom of lashes and wiggle back and forth. Follow with another few sweeps of the wand. Apply to bottom lashes as well. See How to apply mascara for step-by-step instruction and extra tips.
Subscribe to:
Posts (Atom)


